(CORRECTIONAL STAFF) Creating and issuing surveys to your population
Edovo can be used for creating and publishing surveys for your incarcerated residents. Prior to beginning, please review the following:
- Surveys can be made available to your entire agency (County Jail or DOC) or specific facilities (Prison A or Prison B within a DOC) within your agency. Edovo cannot make surveys available to only certain portions of your population or individual residents.
- Surveys are not anonymized. Edovo tracks every keystroke made in the application and by whom. We do this for the safety and security of your agency.
- We do not analyze the results of your survey. Responses to the survey will be made available in Insight through a CSV download option for your team to analyze. Results will be viewable by anyone with Strategic access to Insight.
- Surveys can be enabled for a set time or left up indefinitely.
- Residents are able to skip questions they do not want to answer.
- Residents are able to submit responses more than once.
- Surveys must be built by agency staff members through Edovo editor.
Building your survey
1. Using your Insight credentials, log in at editor.edovo.com. If you do not have an Insight account, reach out to your agency's Edovo administrator.
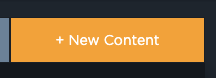
2. On the top right, click " + New Content "
3. Scroll down and select "Survey" and then "Start Building"
4. Upload a content icon, such as an agency seal or something to represent the purpose of your survey. Add a title and description. We recommend telling residents the purpose of the survey, how many questions or how long you anticipate it taking to complete the survey and what the results will be used for. Once complete, click "Save and continue". This section can be edited later be clicking "Edit Info" on your Editor homepage.
5. When ready, click "SECTIONS" to start building.
6. Click "+ Add Section" and repeat the survey title and description. Once entered, click "+ Add Section". We recommend only one section for your survey. Additional sections are typically used for lessons or distinct content groups. A survey with multiple sections will likely deter residents from completion.
7. In your first section, click "Edit pages." Here is where you can start adding questions your survey. By clicking on the item on the right, you will add it to the survey in the middle of your screen. You can also add a title or instructions to fill out the survey. Once your title and instructions are in, we recommend one question per page in a survey.
A few key tips and tricks:
- When clicking into an item, to you can reorder the content on the page by noting which number placement it should be in, you can duplicate the item or you can delete the item.
- Use a "multiple choice" question if you want the resident to only select ONE answer. Use "multi-select" if you want them to be able to select multiple answers.
- You can add as many options as you want to a multiple choice question.
- There are multiple options of likert scale questions for your use. If these do not fit your needs, you can create a custom likert scale question by adding your own multiple choice question.
- A red box around your item indicates you have not filled in the empty fields.
- Remember to remove formatting to avoid any transfer of bad data.
How to implement preconditions
Using preconditions allows you to target questions based on the answer to a previously answered question. The following example shows how preconditions will work:
1. On page 1, we ask: "Are you a parent?" And provide two possible answers:
2. Add a page. On this page, I only want those that answered "Yes" to page 1's question. First, I added my question, and filled out the text fields:
3. Then, I will click" Precondition" at the top. Here I will set the question and answer that I am expecting will lead. For this example, I want them to say "Yes" that they are a Parent. Click save.
Publishing your Survey
Once you are done creating your survey, you must fill out a ticket here to get it published. NOTE: your survey will not be visible until the Edovo team enables it.
Select "I am ready to publish a survey I created for my residents" in the drop down and fill out each section. If you would like to preview your survey before publishing, please note that in the description of the ticket. We will add it to a preview facility and send you a link to review. Please also include an expiration date of the survey should you want the survey to be removed at a specific date.
Once your survey has been approved by you and/or your administration (your administration may have implemented an approval process), we can enable the survey at the select or all facilities associated with your agency. Publish-ready content should be enabled within 7 days of receipt.
Getting your results
Once your survey is live, you will be able to download all results or results filtered to a specific facility or date range in Insight.
1. Log into Insight at insight.edovo.com
2. Head to Content and search for your content title. Click into the survey.
3. Click Learner responses
4. From there, you can adjust your date range of submissions, filter to specific facilities under your purview, filter to specific learners or questions or export the data.
If you have any additional questions, please open a ticket at support.edovo.com. Thank you!
Related Articles
(CORRECTIONAL STAFF) Edovo Brochure for Agency Staff
Download the full PDF attached.(CORRECTIONAL STAFF) Before Launching Edovo: Preparing Your Staff
Launching Edovo in your facility means that you now provide tens of thousands of hours of educational, vocational and self-improvement programming to your population. There are a few key groups to share this information with: Administrative Staff ...(CORRECTIONAL STAFF) Getting Started: Edovo Editor
What is Edovo Editor? Editor is Edovo's content creator tool empowering facility staff, community organizations and content providers to build and upload engaging and effective digital curriculum to Edovo Learn. Create correction-ready digital ...(CORRECTIONAL STAFF) Once Edovo is Live: Favorite Features
Not sure where to start with Edovo? Listed below are some of our facilities favorite and most used features of Edovo. For the Learners: Overwhelmed by the number of certificate requests? With Edovo, family, friends, and representatives of Edovo can ...(CORRECTIONAL STAFF) Edovo Demo Videos
Before engaging with Edovo, it may be helpful to understand more about what is provided when deploying Edovo Core. The following videos will help provide an overview of the platform and what is available. First, a brief demo of the Edovo Core Suite: ...